
A recent addition to Elementor in early 2019, popups are something that I have been waiting for since last year.
If you are building any kind of email list, or offering promotions on your website for products or courses, then this is tool you need.
The popups of a few years ago were simple, always on and annoying. However, the modern "popup" tools offer many different options for display (popup, slide-in, top/bottom bars etc) as well as helpful options for configuration.
In this quick tutorial, I am going to show you all of these in Elementor Pro, and how you can use them.
But first, a brief overview of what is available in Elementor Pro Popups...
Elementor Popup Features (Overview)
The team at Elementor waited a while to add popups, but when they did, they came out of the gate with a bang!
Everything I love about Thrive Leads (another popup tool I use) is in here, except statistics. So, if the numbers are important, you might want to consider that as an alternative, but Elementor has the rest.
I will go over all of these, showing you step by step how you would create a popup, modify the design and configure it. Not all the details, but to give you an idea of what is possible.
However, before we go any further, it should be clear that in order to create popups with Elementor you need to have Elementor Pro. You get a whole bunch of features in the free version, but the more powerful ones are always in pro.
Check out this post if you want to compare Pro with Free Elementor.
Now that we have that out of the way, where are the popups and how do you use them?
How To Start Using Popups With Elementor
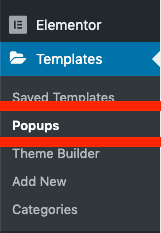
Head to the main Templates menu on the side of your WordPress, and under there is a sub-menu called Popups. Click on that :>
This opens the popup overview page where you can create your first popup.

Clicking on the ADD NEW POPUP button gives you a template creation dialog where you just need to give your new popup a name, then click Create Template down the bottom.
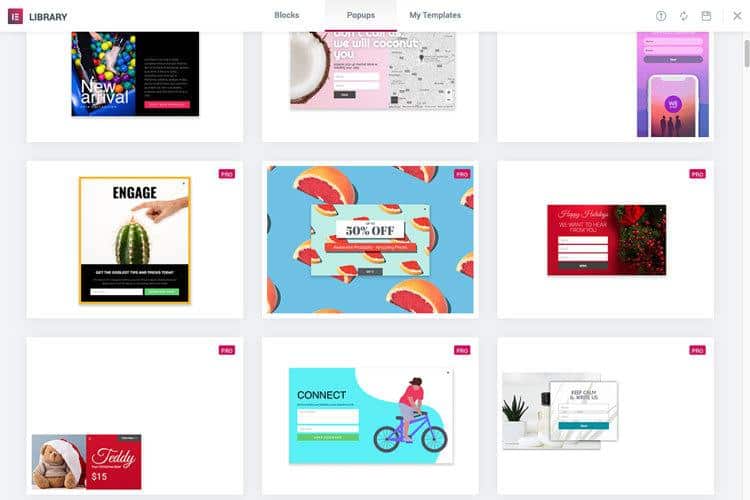
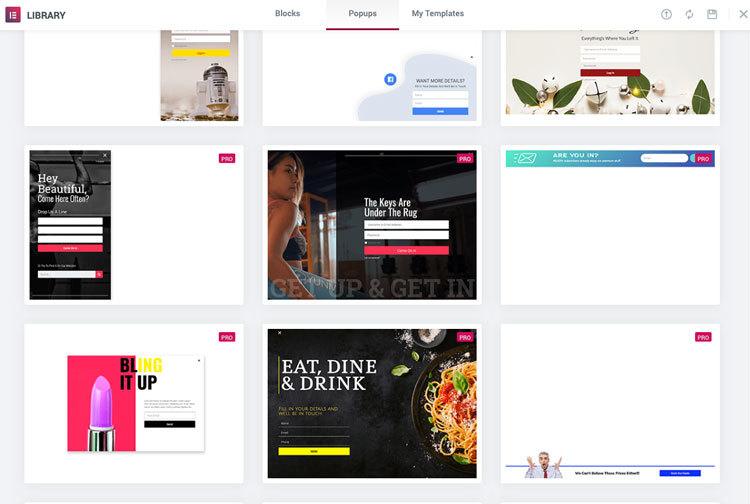
This opens the library of popups you can use to create yours from – or you can just close that and start from an empty popup if you like.
Elementor Popup Library
Rather than having to create yours from scratch, Elementor Pro (like with all template types) gives you lots of options to start from a pre-built popup.
This means you get a lot of different designs to choose from, as well as different style popups like:
- standard popups
- slide ins
- top/bottom bars
Here are what some of the over 100 options look like:
Here you can see some of the slide ins and bars available too:
Once you have found a popup option you like, you click on it and hit Insert.
Pro Tip: Just keep in mind that the type of popup you want is not labelled, but implied by design. It is not hard to figure it out, but just be aware that it is easier to pick a style you want first, rather than crowbar one that was not meant to be what you intended. If you choose the wrong one, you can always create another popup or some of the settings if you need to, but sometimes it’s just easier to start over.
Editing The Style & Content Of Your Popup
Once you have chosen your popup, it appears in an Elementor editor like any other elementor page or template. All the elements used to design the template are standard, like text, columns, buttons etc.
But, there are some other popup specific settings you have access to on top of the elements and settings you will be used to.
For example, you can customize just about anything you would expect on a popup including:
- Position of the popup
- Overall size
- Background (color, image etc)
- The transparent overlay (on/off, color etc)
- Close Popup button (on/off)
- Any animation (to help draw attention to it)
Here is quick look at that part of the settings panel:

Advanced Popup Settings
Here is where you can set up a few more complex rules to control:
- When your popup closes automatically
- When you show the close button (to stop too quick closing)
- If your popup can be opened by clicking on a specific element
- Some other features like preventing scrolling and certain keys, as well as too many popups overlapping (in case you have more than one)

Integrating With Your Email System (Mailchimp, Convertkit etc)
Elementor Popups uses the existing Form element in the popups, which is tightly integrated with a whole bunch of well-known email tools - Mailchimp, Convertkit, Active Campaign, Mailer Lite and Drip. And if you don't have those, you can always use Zapier and webhooks, or simply normal email to send the data to yourself.
So, when you choose a popup with a form in it (or add one) you can choose which list, fields etc are shown and used to save the data in your email system.

It is pretty simple to do, and involves a couple of steps:
- Click on the Form in the popup and then go to the Settings and Actions After Submit
- Add in your email tool as an action (and remove Email that is in there by default)
- Now a new section appears in the settings with the Heading of your email tool
- Click on that and you can set up the specific list and fields you want to use. This part depends a little on the tool you use.
- Once this is set up , and saved, you will need to test it live to see that the emails are actually going into the list (always test :>)

Note: If you have not set up your email tool already in the integration section of Elementor, you need to do that first! (It's in the main menu on the left of WordPress, not in the Elementor editor). You will need the api key etc from your email tool too, so if you don't know how to do that click on the link in that section of the Elementor Settings, they have one for each tool that takes you to the help.
This is what that part of Elementor looks like:

Publishing and Controlling Display Of Your Popup
Once your popup is ready for the real world, you can hit Publish as you would with a page or post, and then another option-rich popup appears where you can seriously control your popup.
Conditions - What Pages Does It Appear On
The first one is conditions, which is how you can specify which page/post/category etc. your popup will appear on.
This can be as simple or as complex as you like. For example, you can choose "Whole Site" for a site-wide popup, or you can go to specific pages or categories or posts if like.
The options here are very broad and offer you a lot of power to control your popup's appearance.

Triggers - What Opens The Popup
Now you have to decide on what kind of "event" will open the popup. Again, you can go super-simple and just open it when the page loads.
Or, you can decide to wait until the reader is a little more engaged (likes your content) and scrolls to a certain percentage. Or just wait x seconds.
Another popular one is to catch the user when they are leaving (their mouse heads outside the browser display area).
Combinations are also possible, just make sure they make sense. My standard is to open the popup after a certain period of time or scroll and also add exit intent just in case they leave earlier than the point you set.

Advanced Rules - Further Control When Your Popup Appears (Or Doesn't)
This is something I have not yet seen on other popups, so paint me impressed! And that is rare. Most of the other companies doing this are creative too, so I am sure they will catch up, but here is what you get:
- Restrict popups to people coming from specific URLS (social media, referrals from other websites, etc)
- Only show when coming from a certain type of website - search, external sites, internal pages
- Only show after so many page views or sessions (that way you catch very engaged users)
- Hide for logged-in users
- Don't display after x number of times
- Restrict to certain devices (mobile, tablet, desktop)
This is all they have for the moment but I am sure it will grow!

Once you are done here, your popup is live and ready to see on your site.
I recommend checking it in an Incognito Browser so you are sure it is appearing where and when you expect. This stuff can get complex and messy if you add a lot of conditions, so checking is always worth your time!
